Saturday, March 19, 2011

Dinosaur Bento Box

As promised, I am showing you the super fun sandwiches that I made for the bento box from my last post. My daughter is in love with them, and keeps asking for them, especially in the morning when she wakes up! So, without further ado, I give you the grilled chicken and cheese dinosaur sandwiches!

Okay, okay, I know I made them just a tad bit crispy, but my daughter never once complained! This sandwich was made with some leftover shredded chicken. I love to bake a whole chicken because it will feed my family for four to seven days! Here is how I used it in this fun little set of sandwiches:
I got this little beauty at the grocery store, near the bread. There are other fun shapes available, but I wanted to do a boy friendly version of bento lunches. Oh, and I am fully aware that this particular dino did not, in fact, have scales down the back, but it added a special touch to the sandwich! Now, let's get started.

1. Butter one side each of two slices of bread. With the butter facing out, slide a slice of cheese between the bread. Carefully line up your cutter on top of the bread.
*My bread was smaller than the cutter, so I just made sure that the head was cut properly because you won't see the feet as easily once it's in the bento box. Also, be sure to use a super flat surface, or you'll only cut out the top layer of bread.

2. Seperate the dinos, and set them right side up. Slip the top slice of bread off the top of the dinos, and add your shredded chicken. Be sure to have the edges of the chicken hang off the edge along his back if you want it to look like spikes. Then replace the top slice of bread.

3. Carefully place the dino into a pan, which has already been heated on medium low-medium heat. Brown on each side, being careful not to lose the chicken when you flip them. * I find that if I stick the sandwiches in chicken side down, and cheese side up first, they flip easily when I go to brown the other side.

4. Place the two dinos in your bento box. While they are still warm, cut out a small piece of cheese and stick it on the dino for an eye. Fill the rest of your box and you're all set!


Thursday, March 17, 2011

Fruit How-to

I love fruit, but when it comes to feeding my little one her lunch, the first thing she'll eat is the fruit. Many times she will only eat the fruit and claim to be "all done" before she touches any of the other healthy foods on her plate. So, it is absolutely essential for me to limit the amount of fruit she has during her meals. One way that I do this (which also happens to be a wonderful way to make your fruit last all week long without buying a ton of it) is cutting the fruit into shapes that contour to the lunch boxes a little better.
Strawberry prep
Strawberries are great fillers, and are great for adding a pop of color to your bento. I slice several long cuts from the top of the strawberry through to the bottom. I make sure they are all parallel, and about a 1/4" thick, but really it doesn't need to be perfect. Be sure to leave about a 1/4" of the berry uncut below the green stem, or the strawberry will fall apart.
Add a touch of pressure with a gentle squeeze and help the fan shape with your fingers. Not only is this pretty, but it helps the strawberry have some flexibility when you put it in your bento box along with other foods.
Orange prep

I like naval oranges. These ones are pretty big, so I get more mileage out of them. I start by cutting off the two ends. Be sure to cut the navel end, and the end where the stem used to be. That makes it so you can see the center of each slice, and it is easier to eat. Next, I cut it in half going parallel with the previous cuts.
Now I cut the halves again, so I have four rounds. With each round, I slice it in half (you'll end up with two half circles), and it is ready to go into my bento box.
* If you are going to make a fruit salad, you can easily peel off the rind, and cut the oranges into bite-sized pieces. I also save the top and bottom that I cut of first, and squeeze the juices into the mix. MMMM!*
Here they are, side by side in my daughter's German lunch box. There is enough room for a sandwich if it is cut diagonally, or in fun shapes (hint: check out my next blog to see the sandwich I added to this particular box). With this lunch box, the lid is as deep as the bottom, so the possiblility of food flying around during transport is pretty high. That is why I reserve this box for sandwiches or leftover pizza. They won't be too damaged if they move around a bit. Neither will the fruit!

Sunday, March 13, 2011

Bentos are great for weight loss!


Lately, I've had a really hard time knocking off my holiday weight, so I decided to use my bento boxes to help me slim down. I am the kind of person who cheats on diets. Alot. So I've stopped "dieting" and set up some personal guidelines for losing those pesky pounds.

First of all, I realized that I wasn't eating vegetables like I should have been. In fact, there were days that passed by without any vegetables at all! Vegetables are a powerful ally in weight loss. They are packed with vitamins, taste great raw or cooked, and don't pack alot of calories.

Metabolism is a tricky thing to outsmart, and if you feed your body veggies when you feel hungry between meals, you can help your body's metabolism stay on top of things. In my mind, if I eat more vegetables than anything else, I am right on track!


Second, I make sure to eat at least one serving of fruit each day. Fruit is a great little snack to have on hand when cravings get strong for something sweet.


Third, I took my meat portions and started to rethink how much I consume. Proper portion sizes are much smaller than what I normally would cook, so I made the decision to cut back the amount of meat I use for my family. I will use one full chicken breast and a tenderloin (there are three of us, one of whom is three years old) or about a cup and a half of shredded/chopped chicken/beef/pork.


I also have a few days where I add either vegan and/or vegetarian dishes. I don't do anything drastic, just a super tasty stir fry with rice. I also embrace shrimp and fish, and add a couple of dishes with that in them, too. Mmmm, tuna melts!


Fourth, I make sure to have two or three servings of dairy. I have skim milk in my cereal each morning, and eat some cheese and greek yogurt during the day, either in my bento meals or as a little snack.


Fifth, I stop eating three hours before bed. I have a friend who used to describe the feeling of slight hunger as her body eating her butt! Hahaha! So, her mantra "EAT MY BUTT!" runs through my head when I feel just a little uncomfortable. It makes me smile :)


Finally, I watch how many processed foods I eat. I try to stay with the outer isles at the grocery store while shopping, (with the exception of rice, pasta, bread, and cereal). I like sticky rice because it's easy to shape, it's filling, and I can use it with my stir fry. Plus, it freezes beautifully. Oh, and leftover rice is wonderful for easy rice cassoroles, as well as for fried rice.

When I make bentos for my husband, I fill a whole bottom tier full of rice, and the top tier with the vegetable stir fry. For me, I fill my top tier with stir fry, and my bottom tier I divide in half so I can fill half with rice, and the other half with raw veggies/fruit/cheese. My bento box is the one above. Isn't it cute?!


Oh, and I should mention that my milk is skim milk, my tortillas are wheat, and my bread is wheat. I can't give up my full fat cheese, though. No way!

Friday, February 25, 2011

The super cheap way to shape rice


This adorable lunch box is filled with some simple leftovers from my stir-fry and rice dinner. I had to add a touch of fun to it, though, so I used a simple cookie cutter to make a heart-shaped rice patty. This method can be used with lots of different cookie cutters, so give it a try!


Start with your simple cookie cutter. I used my el cheapo ones that are easy for little ones to use with ease. Just place it on your plate after your spritz it lightly with some cooking spray.

Fill it with rice. Since it's sticky rice, sometimes it helps to slide the spoon off the inside of the cutter to make the rice stay inside, and not on the spoon. Pat it down to make it firm.


This lovely heart rice patty is what you end up with once the cutter is removed. Sah-weet! Gently lift it from the plate and place it in your dish.


Once you've done that, you just add the stir-fry to the outsides of the dish and you are ready to go. With bento's, be sure that the food is flush with the top of the box (or simple tupperware works well, too). This prevents it from moving when it's moved. I had to add a thin layer of stir-fry to the bottom of the dish before I put the rice in so that it was flush.

Tuesday, February 22, 2011

It's fun to play with your food!

I love being able to cook for my family, but I do get tired of doing it on a constant basis. And while it may be more convenient for me to just pop a pizza into my oven and call it dinner, I am trying to get my family off of packaged food and more into food made from scratch, and less processed foods as well. I am trying to stay as close to the outer isles of the grocery store as possible. Yeah, I am all for cooking things from scratch, but um, I am going to use premade bread, pasta, and cereals. Oh, and tomato paste and juice. Because hey, I have to draw the line somewhere!

Color is important now that I am trying to eat healthy. The more color I have in every meal, the better it is for us. And of course, you have to add portion control to the mix to really kick it into gear. Add a touch of cuteness and you've got bento boxes! These little lunch boxes are from Japan. I've actually gotten a few here in Germany. One was a toy in the McDonald's happy meal and one I found at Rofu Kinderland...the toy store! There are many cool gadgets you can get to make your food cute, which I do for my daughter and sometimes for myself. My cousin sent me some rice molds that work beautifully with sticky rice. I use Nishiki rice. I think that's what it's called, anyway.

Isn't this puppy adorable?! I made his face with some carrot bits and a little red pepper from the stir-fry in the lunch. Yum! I divided the sweet apples from the main dish with some curly lettuce. Not that I expect my daughter to eat the lettuce! Here's how I made the puppy rice:


First, prep the mold with a quick spray of nonstick spray on the inside of the container and under the face of the pup.


Next, assemble the pieces. The face needs to be down, and at the bottom so you can fill it up with the rice. Fill the cup with rice, gently pushing it in to avoid air bubbles.


Next, put your rice mold right side up onto a plate.
Then, add a little pressure to the face, and squish the rice down as far as it will go. This packs it tight, and makes the shape sturdy. Be sure to keep the outside firmly on the plate surface or the rice could push out underneath it.

Slip off the outer cover to reveal the rice stacked neatly with the puppy face attached.
Now carefully remove the plastic "mask" and voila! your puppy rice is ready to be decked with a cute face! I used veggies to make mine, but you can cut out little pieces of cheese and lots of other fun options.
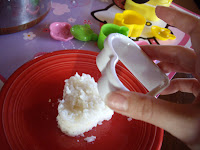
I put the puppy rice into my box first, and then added the stir-fry to the edges to pack it all tightly.